
Certificates with Microsoft Entra ID
With certificate-based authentication (CBA), Microsoft Entra ID (formerly Azure AD) logs users in with a personal certificate instead of a password. Together with TheFlex, the certificate comes from the smartcard.
The certificates are created beforehand, see Certificates. The overall process is described in Login with smartcard.
You make the settings in the Microsoft Entra Admin Center, available at entra.microsoft.com. Microsoft occasionally renames menu items. The steps stay the same.
1. Upload the root certificate
In the admin center, open Security > Certificate Authorities.
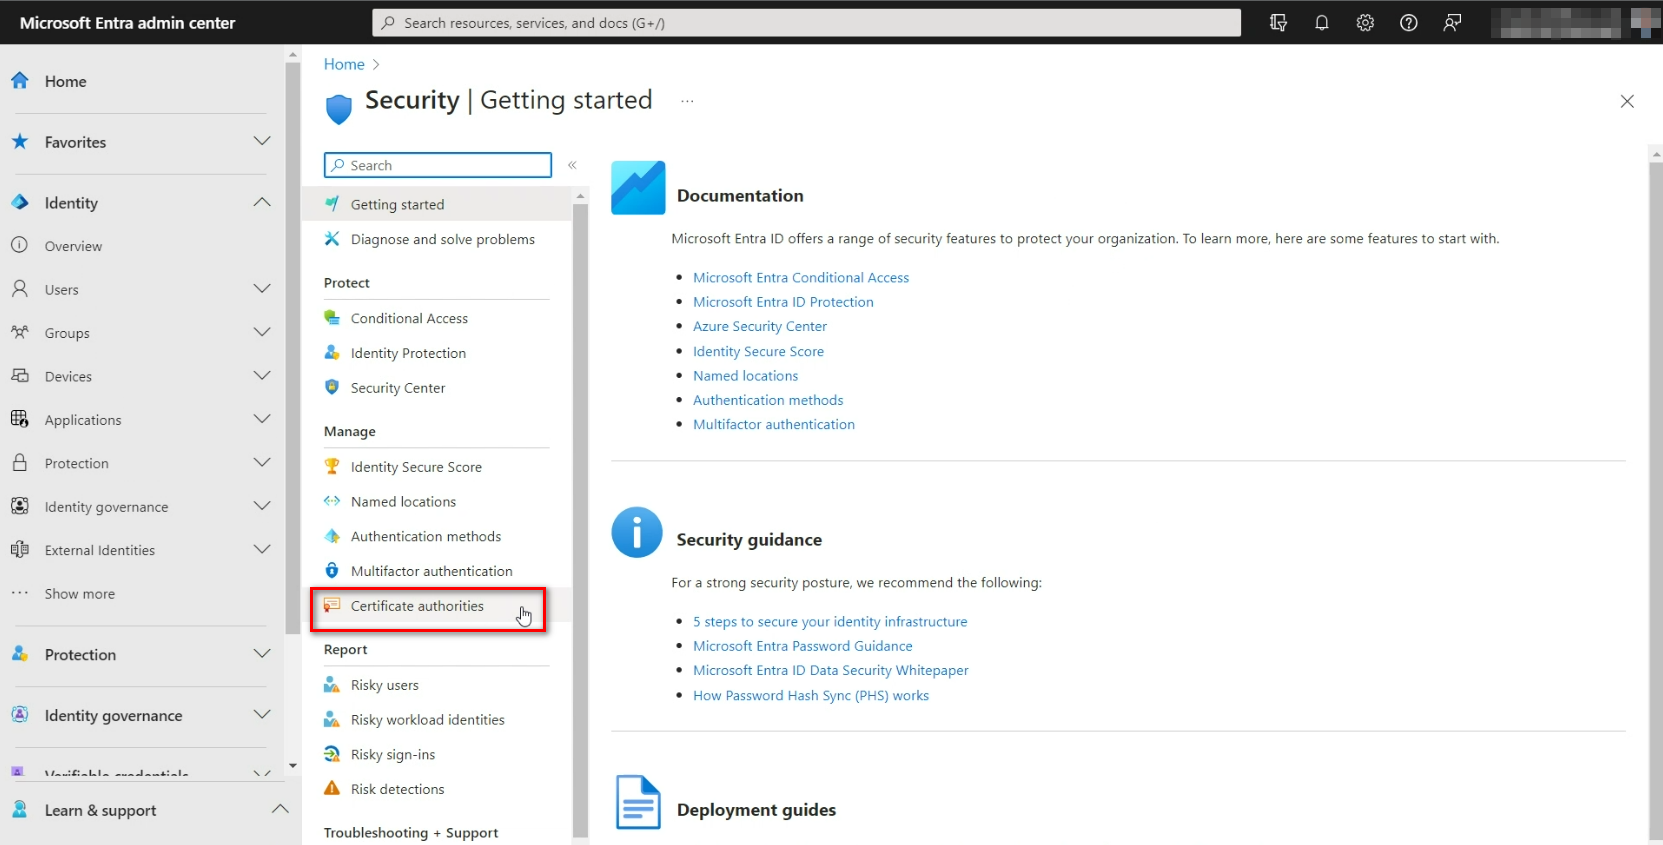
Click Upload and select the file ca.crt.
Answer Yes when asked whether it is a root certificate.
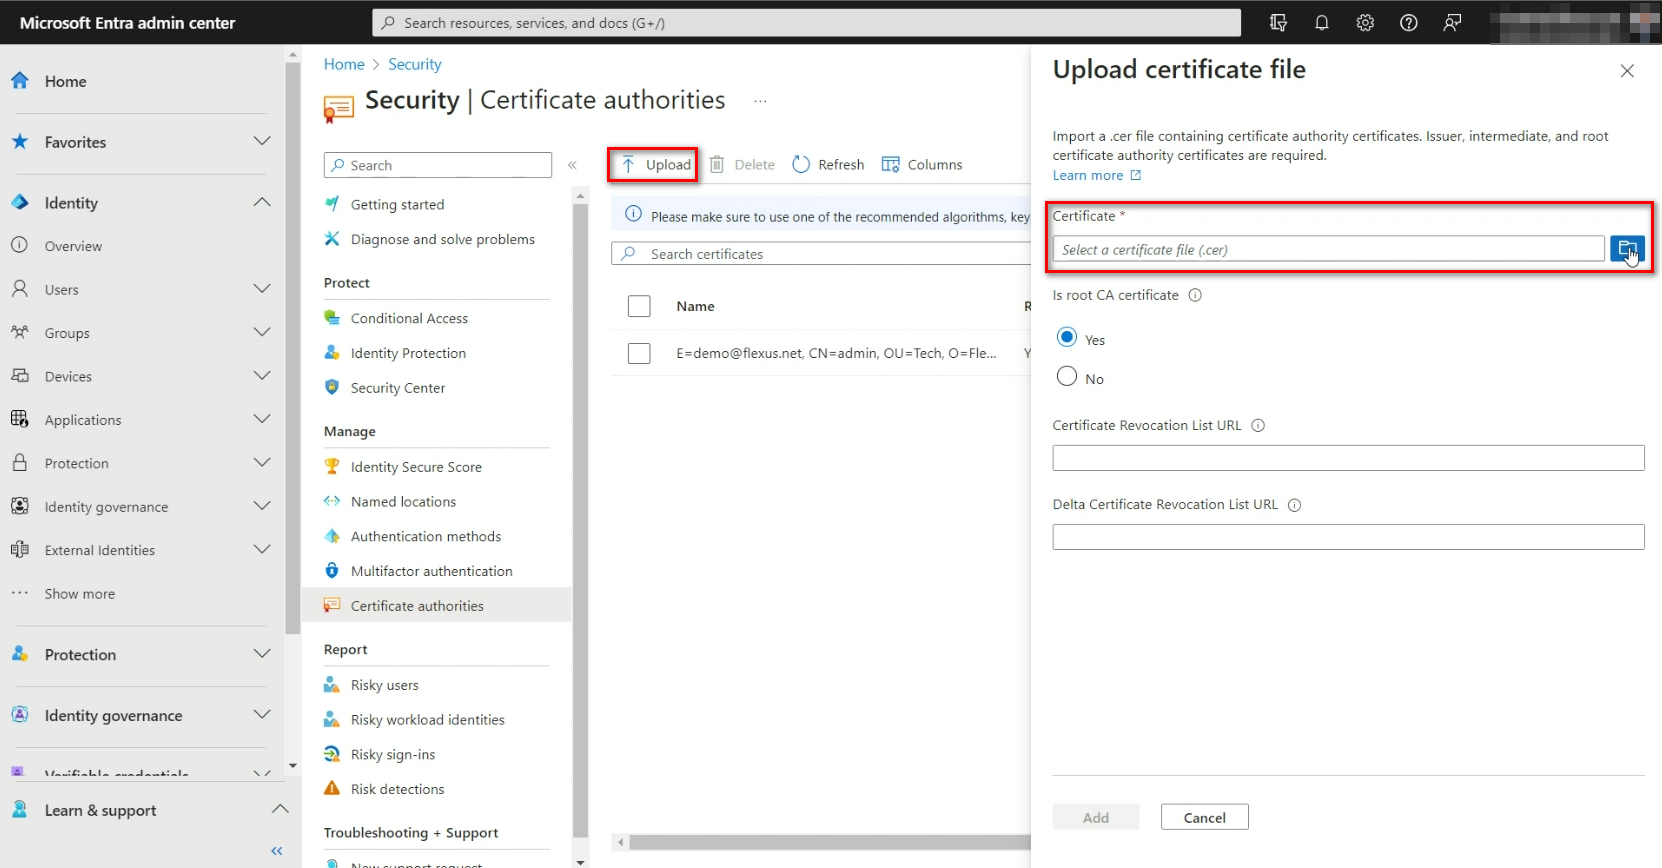
The root certificate now appears in the list.
Note
If the file is not shown or not accepted, rename it from ca.crt to ca.cer.
2. Switch on certificate-based authentication
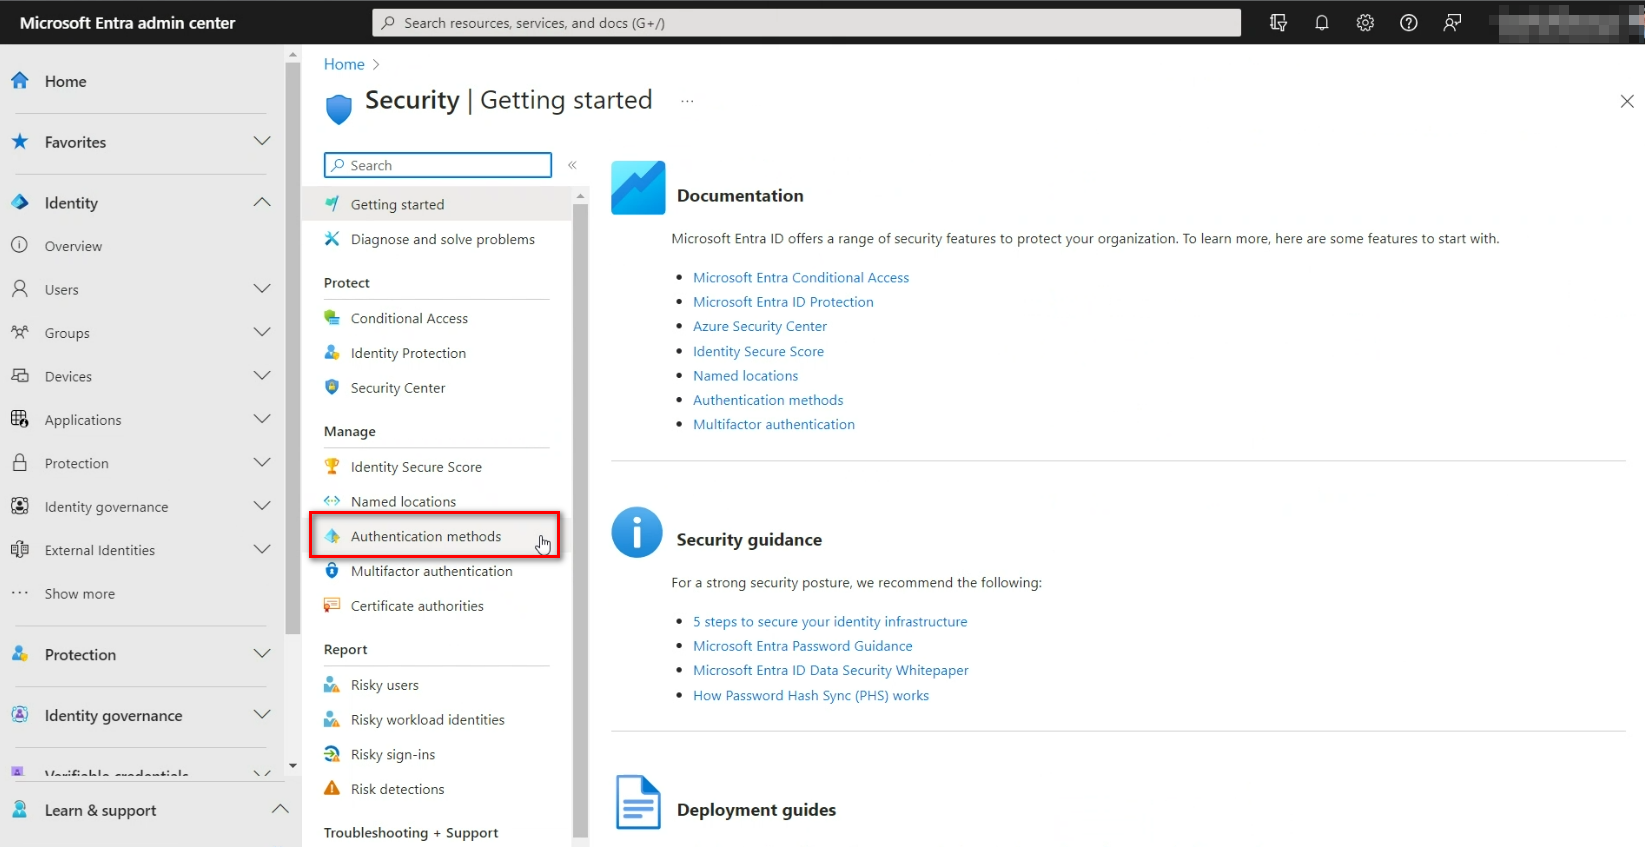
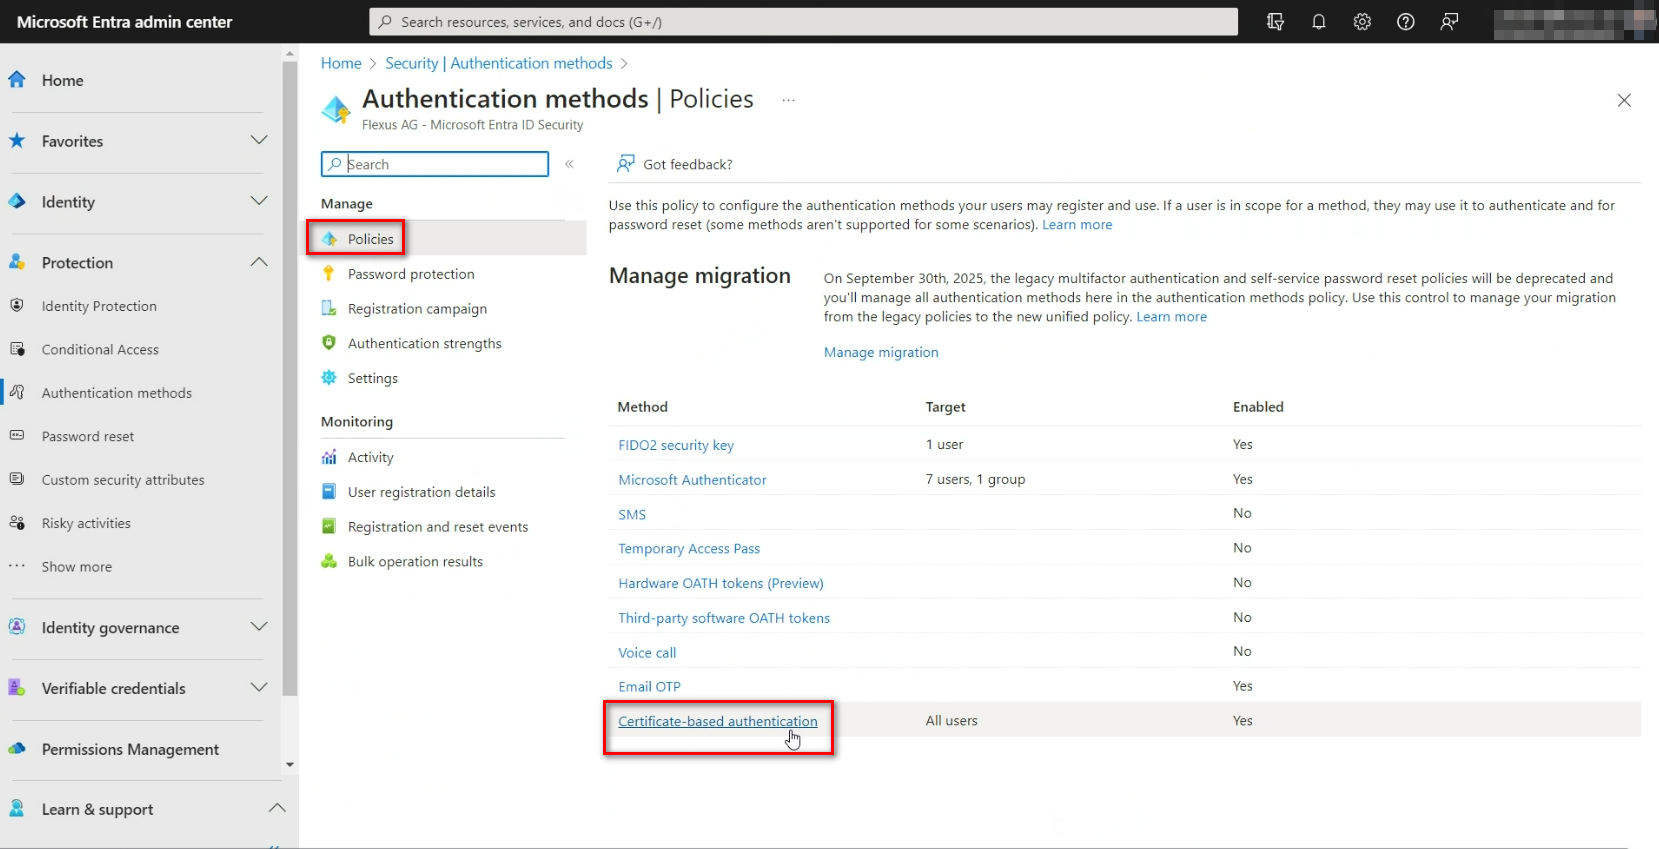
Open Security > Authentication Methods.
Under Policies, open Certificate-based authentication.
On the Activate and Target tab, define which users or groups may log in with a certificate. A small test group is a good start.
On the Configure tab, under Add rule, select the issuer, i.e. the root certificate you just uploaded.
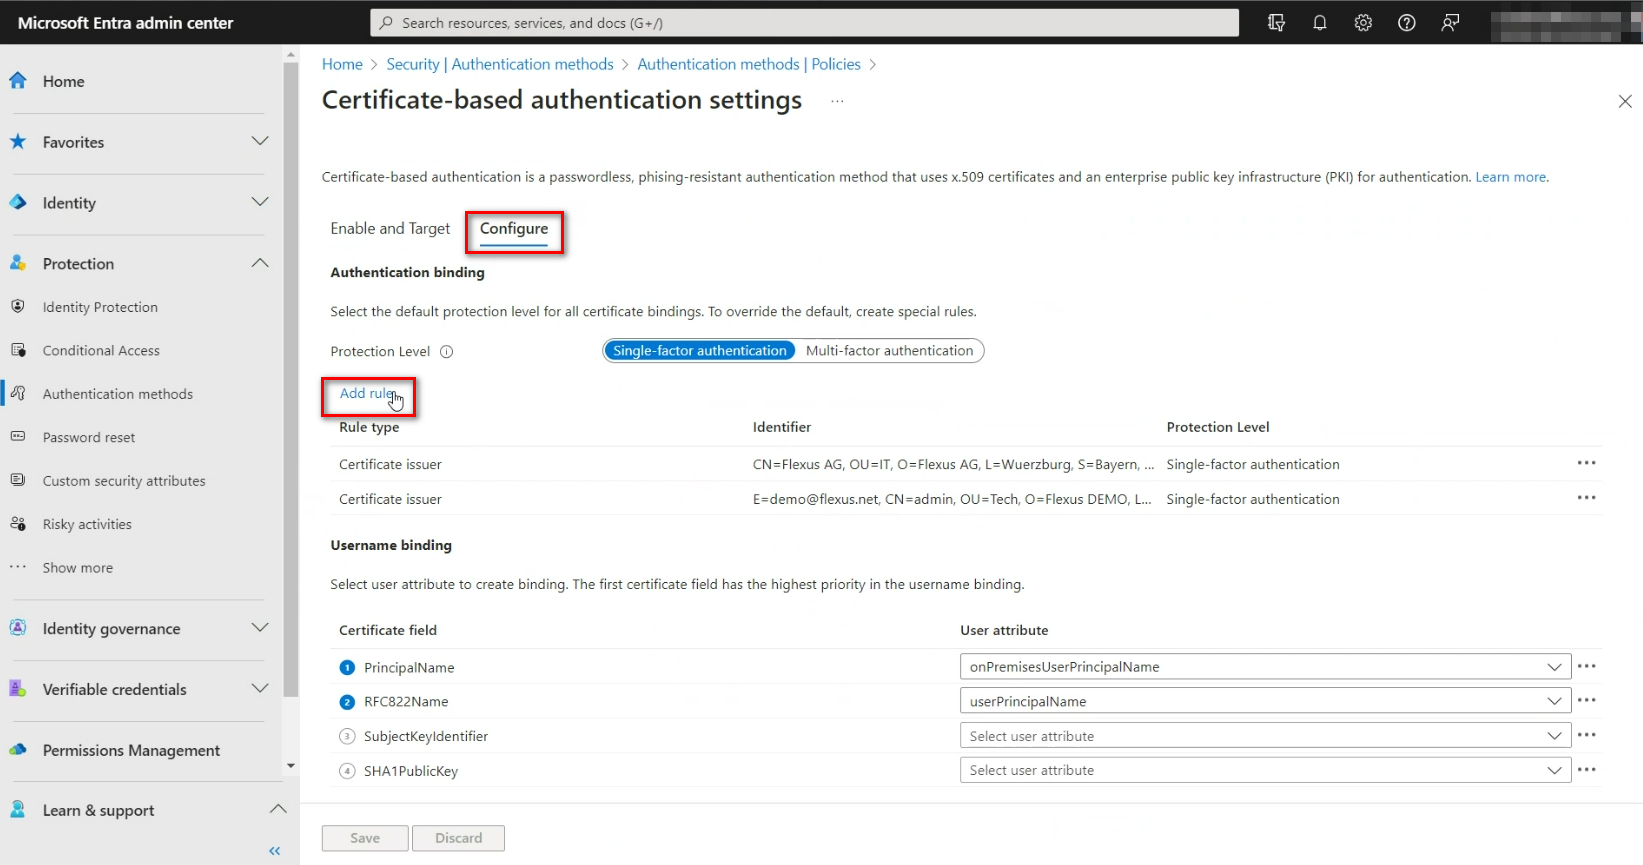
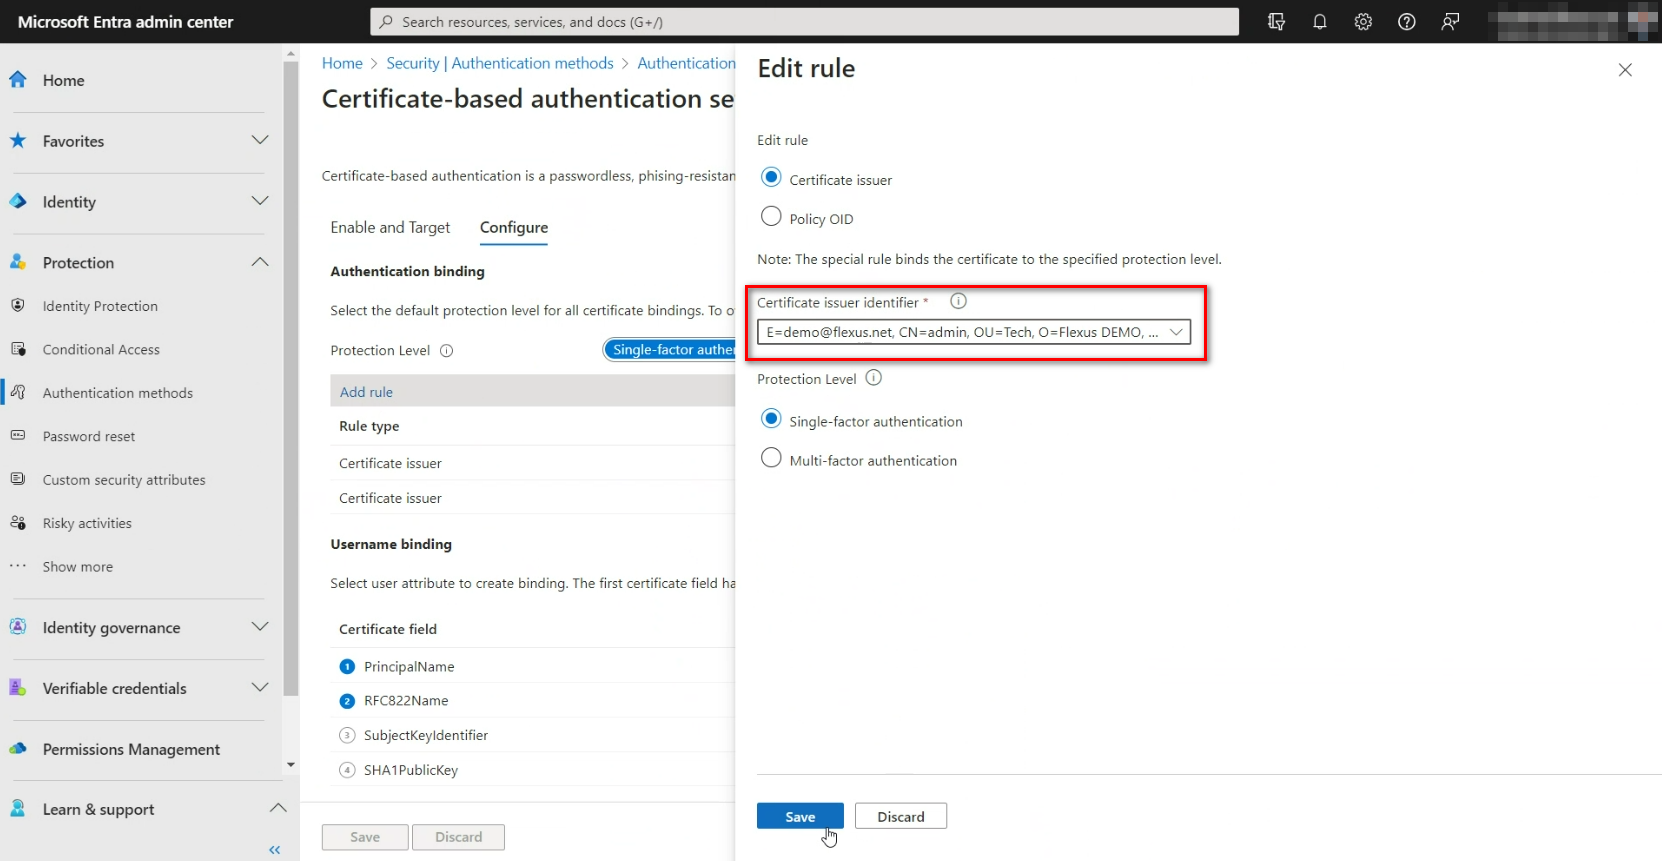
Under the user attributes, check that these two mappings exist:
Certificate field User attribute PrincipalName onPremiseUserPrincipalName RFC822Name userPrincipalName RFC822Name is the e-mail address in the certificate. It must therefore match the user's sign-in name in Entra ID.
Save.
3. Test
- On the PC, double-click johndoe.p12 and install it for the current user.
- In a private browser window, open login.microsoftonline.com and enter the sign-in name.
- Under Sign-in options or Other ways to sign in, choose sign-in with a certificate or smartcard and select the test certificate.
- The user is logged in without a password.
If the test succeeds, Entra ID is done. In TheFlex, login works the same way, except that the certificate comes from the card.