Custom Keyboards
Creating Custom Keyboard Layouts
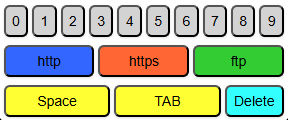
In some scenarios, the default on-screen keyboard layout does not meet the needs of your application. In these cases, you can design and deploy custom keyboard layouts to maximize usability and efficiency.
Activating and Configuring TheFlex Keyboard
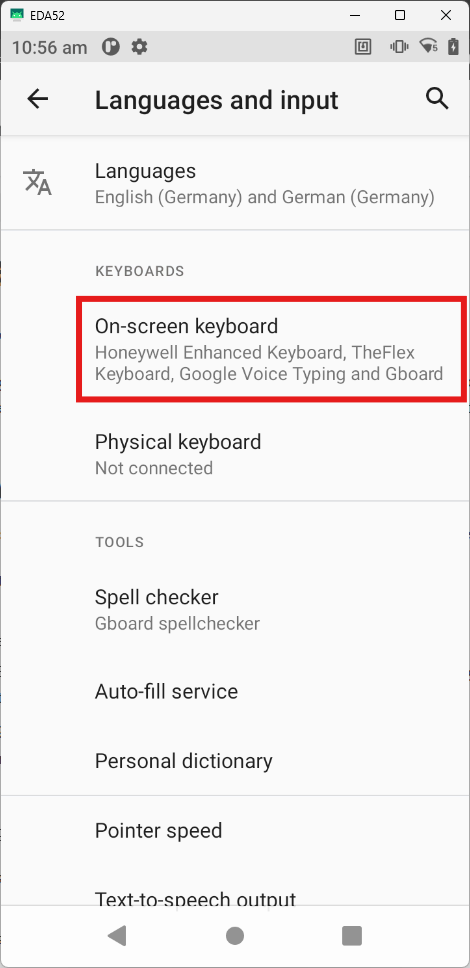
Navigate to Settings > Languages and tap On-screen keyboard
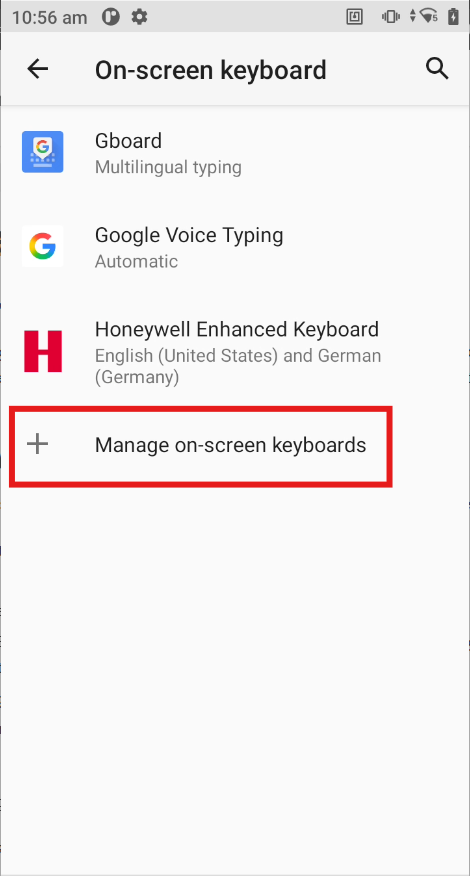
Tap Manage on-screen keyboards
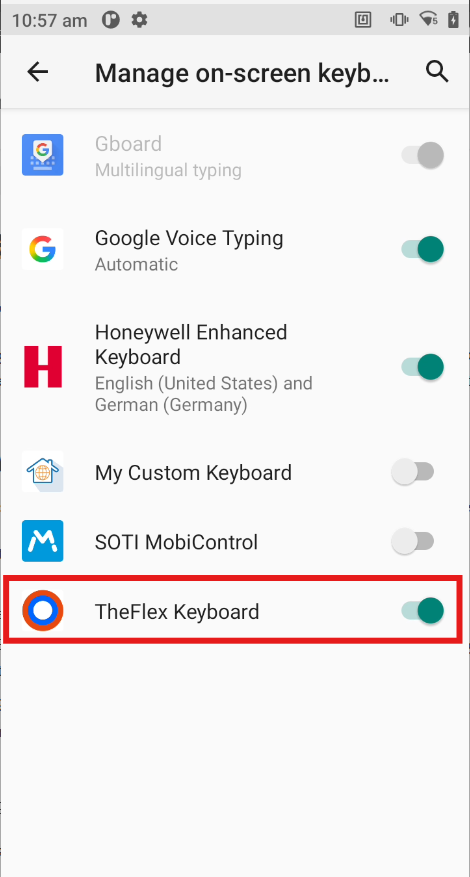
Enable TheFlex Keyboard
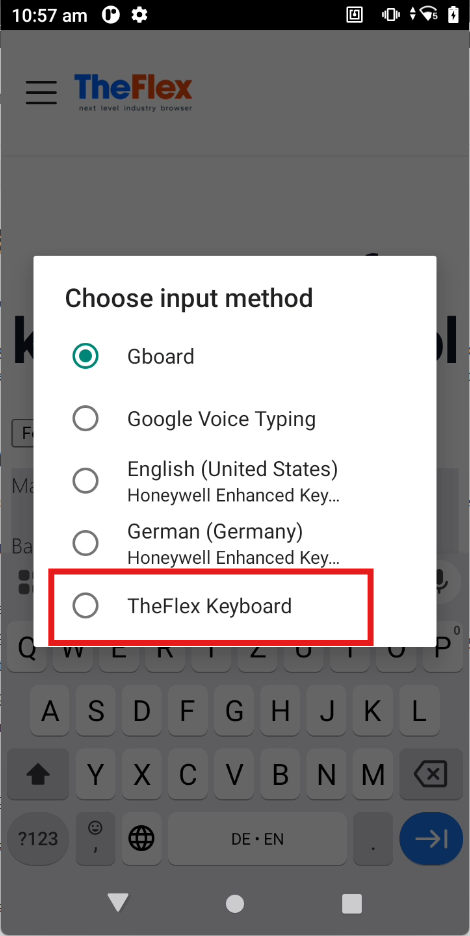
Return to your app and select TheFlex Keyboard as the active input method
Once enabled, you can fully customize key appearance (color, size) and behavior. The Keyboard Editor provides a graphical interface for designing your layout and previewing changes in real time:
Alternatively, you can use an MDM solution, such as SOTI MobiControl or Intune, and configure it there.
Adding Your Custom Keyboard to the App
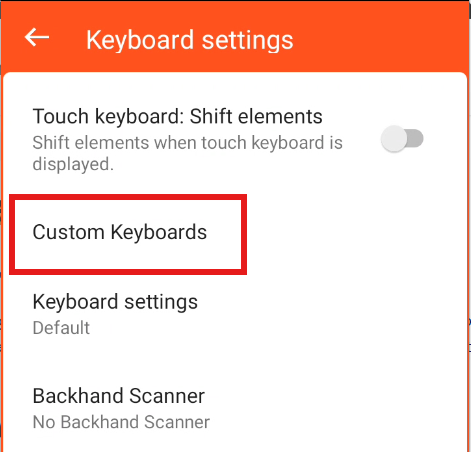
Open the app's keyboard settings and choose Custom Keyboards
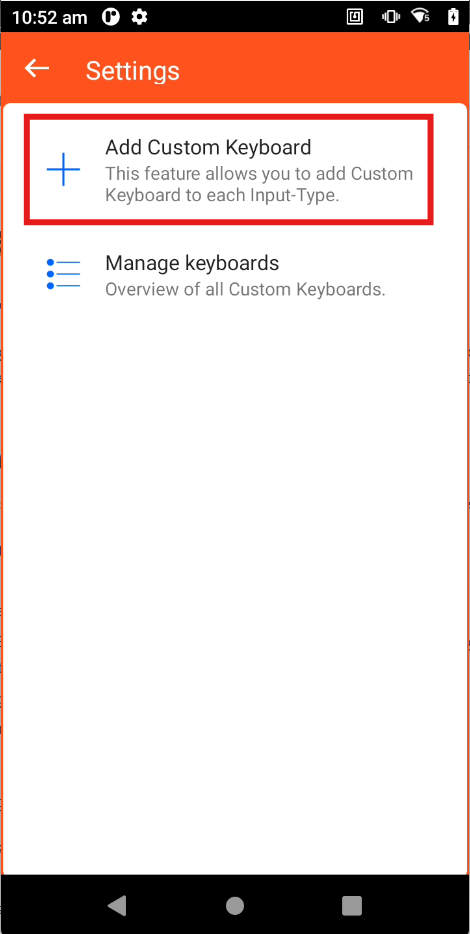
Click Add Custom Keyboard
Select an Input Type from the dropdown; a short description will appear beneath it
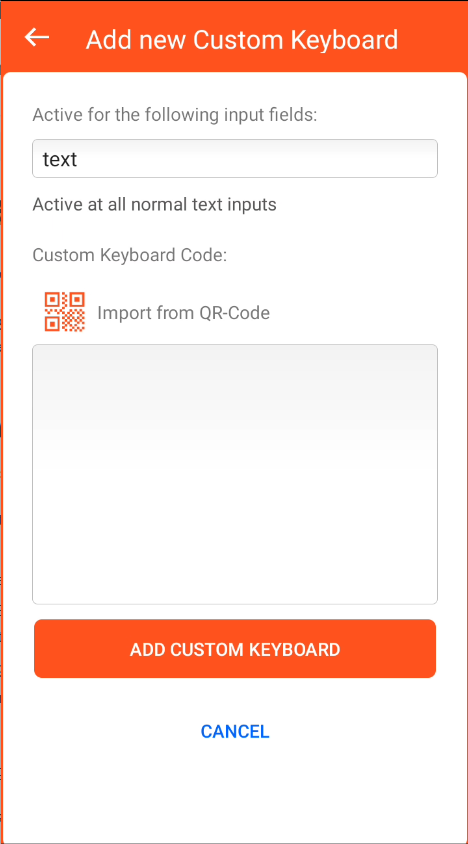
The custom keyboard is only activated for input fields whose type matches your selection. We recommend defining a default input type to ensure a keyboard is always available for any unassigned fields.
Custom Input Types
If you need even finer control, choose Custom Input Type. In your HTML or Fiori app, assign a matching data attribute to your input field, for example:
<input type="text" data-theflex-keyboard="myCustomParameter" />